| Return shipping will be paid by | Seller |
|---|---|
| Returns Accepted | Returns Accepted |
| Item must be returned within | 60 Days |
| Brand | RMSTATOR |
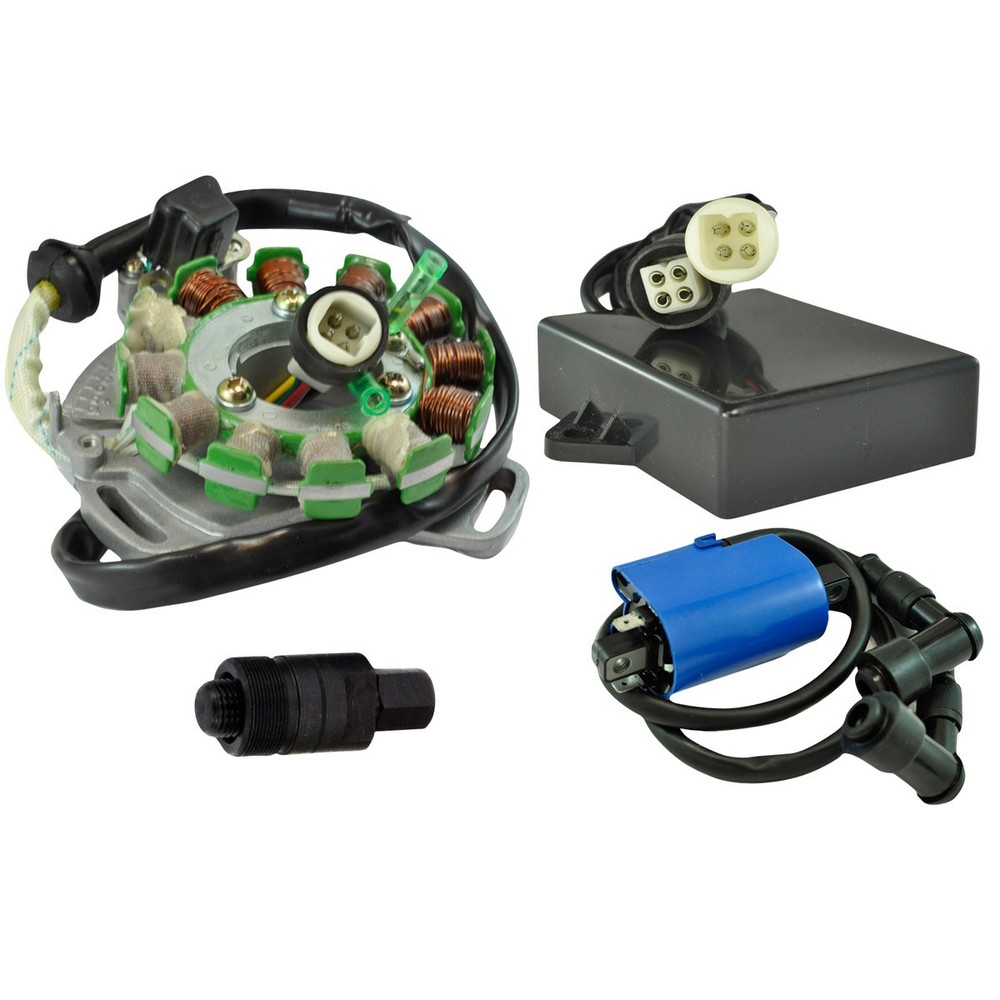
Check the listing for details. Lighting Coil For Yamaha YFS 200 Blaster 2004 2005 2006. Condition: New. Listed at 68.81 USD. Free shipping in USA 2 year warranty Same day shipping visit our store > --> find parts for : ATV / UTV / SXS Motorcycles Snowmobiles Watercraft Other Menu Store Home ATV / UTV / SXS Motorcycles Snowmobiles Watercraft Other IMPORTANT - Important notice about the product.--> Stator Lighting Coil for Yamaha YFS 200 Blaster 1988-2006 OEM Repl.# 2XJ-81313-M0-00 | YFS200 KEY FEATURES  Brand New Lighting Coil Highest grade copper windings, resistant to 200 degrees celsius Often unavailable from the OEM manufacturer All products shipped are tested DESCRIPTION  Brand New Lighting Coil We offer a brand new lightning coil for you to repair your stator. Often unavailable from the OEM manufacturer Highest grade lamination materials Highest grade copper windings, resistant to 200 degrees celcius Works with all other OEM parts All product shipped are tested *All item pictures are accurate; if in doubt do not hesitate to compare our item to your original part. PAcked with these technologies --> Vehicle models fitment  Yamaha YFS 200 Blaster -- 1988, 1990-2006 OEM part replacement  2XJ-81313-M0-00 Specifications  Dimensions : Height : 25 mm Length : 70 mm Width : 22 mm Fixation holes center to center : 55 mm instructions  Read these instructions completely before beginning: Step 1 : Take the ignition cover off. Are the remplacement parts similar? Compare the replacement part to the original. The remplacement part should match, including the mounting hole locations, If not: Double check the application listing with your bike. Step 2 :Take note of the wire colors of the original stator wires and disconnect them from the wiring loom. Step 3: Remove the flywheel using a proper puller tool. Step 4: Remove the baseplate with the original coil. Step 5: Remove the screws that secure the coil and take the coil off. Step 6: Cut the original wire close to the original coil. Take a good look at how the wire is connected to the coil. Connections: Connect the old wire up to the new coil. Use a soldering iron and resin core solder. (the type used in electrical applications Step 7: Mount the coil onto the baseplate, fit the screws using locking compound on the threads and TIGHTEN THE SCREWS SECURELY! Step 8: Refit the stator baseplate. Ensure the wires CANNOT TOUCH THE FLYWHEEL! (especially on the inside of the flywheel) Step 9: Refit the flywheel. Tighten the bolt to specified torque. Step 10: Fit the ignition cover. TROUBLESHOOTING: Engine will not start: Sometimes the source coil wires are reversed. Swap the connections, re-solder the wires and the engine should start. If the engine still does not start, and before calling technical support, performs a few basic tests: Re-check the connections. Make sure you carefully solder the connections. Twisting wires together or taping wires will cause engine inoperability. Check the engine for spark. Is fresh fuel in the gas tank? If you still cannot get the engine to start, have all your testing information ready for a technician prior calling us? customer service AsK seller a question duties & taxes International Buyers: Import duties, taxes, and charges are not included in the item price or shipping cost. These charges are the buyer's responsibility. More than 20 years of assisting mechanics around the world resolving the worst electrical problems made us know our stuff. When it comes to vehicle electrics, we definitively are the power in powersports. Customer service Part requestAbout usAbout seller pageAdd seller to favorite
You may also like